| Applys to: InfoPath | Difficulty: 4 |
If you have been working with rules in InfoPath, you've probably also stumbled upon the limitation to rules, that you cannot create a linebreak. Lets say you want a user to type in some mail information. And since you want to validate the user input, you need 3 or 4 separate fields (at least now, for testing purposes). The 4 fields would be First name, Last name, Address and Zip code / city. For this tip, I will just post the combined text into another text field. From there, you should have an idea on how to get on. Now. The first thing you need to do, is to open a text editor like notepad. Then you type in the following text, and save it somewhere on your pc as "linebreak.xml": <?xml version="1.0" encoding="UTF-8"?> <characters cr="
" lf="
" crlf="
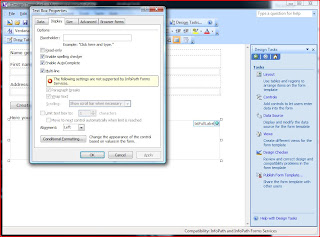
" /> I've created this form, with the fields from before, a button to initiate the action of combining the text, and a field to contain the altered text: To get the linebreak to work, we need to import the XML file we created before. To do this, you go to "Tools" -> "Data Connections" and click "Add...". You want to receive data, so fill out the window as shown below, and click "Next": Choose "XML document" and click "Next": You want to include the file in the form template, so leave the selection and click "Next": If you want to, you can choose another name for the data connection. The name is only used to identify the data connection, but will have no other impact on the usage. Now the linebreak function has been imported, and you're ready to put it to use. However, we first need to make sure, that the text field the should contain the end result, can handle multi-line text. To do this, simply double-click the field, click on the "Display" pane and mark the "Multi-line" option. The last step, is to create the rule that will create our text, so go ahead and add a rule to the button. I've used the concat() function, to combine the fields, and linebreaks: The linebreaks are added like any other field, but to find them, you need to choose the data source name you typed in earlier, in my case, "linebreak": Just select "crlf" and click "OK". If you've created the rule as shown on the above images, you should be able to get the following result, by filling out the 4 fields above the button in preview-mode and then clicking the button afterwards: This concludes this tip. | |
Sunday, May 8, 2011
Add a linebreak in rules in InfoPath
Add a YouTube video to a PowerPoint presentation
| Applys to: Powerpoint | Difficulty: 2 |
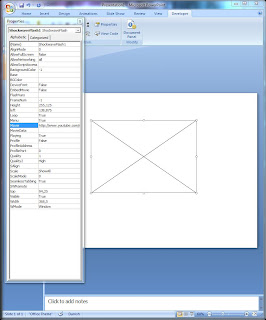
Did you ever want to add a YouTube video to your PowerPoint presentation? Here's how to do it. The first thing you need to do, if you haven't already done it, is to enable the "Developer" tab. To enable the "Developer" tab, click the Office button, and then "PowerPoint Options". In the pop-up windows, you mark the checkbox saying "Show Developer tab in the Ribbon" like this: The next thing we are going to do, is to add a Shockwave Flash Object to our presentation. You find it in the "More controls" button on the "Developer" tab. Locate and click on the "Shockwave Flash Object" option on the "More Controls" list, and click OK.Now you can draw a rectangle on the presentation, where you want the video to be, and if you need to, you can resize it after you've finished drawing. When you've placed the object where you want the video to be, you then need to go to YouTube, and locate the video you want in your presentation. Once you've located the video, copy the URL from the address bar: Now go back to the presentation in PowerPoint. On the rectangle you drew before, you now right-click and then choose "properties". In the "Movie" field, you now paste the copy'ed URL for the video: Almost there. But you need to edit the URL a little bit. You need to delete the part that says "watch?". And replace the equal-sign (=), with a slash (/) So in my case, the URL would go from this: to this: After you've made the changes, you can just close the "properties" box by pressing the red cross in the upper right corner. To test that the movie works, just press F5, and you should see the video as you know it from YouTube. This concludes this tip. | |
Saturday, May 7, 2011
Holidays in Outlook automatically
| Applys to: Holidays in Outlook automatically | Difficulty: 2 |
It is possible to add your local holidays automatically though Outlook. It contains a large database with most holidays in most country's. All you have to do, is to activate them. If you open up outlook and choose "Tools" and then "Options". In the new window under the Calendar area, you click the button "Calendar Options". In the next window, you click the "Add Holidays" button. Now, you find your country on the list, and put a put a check mark in front of it. After that, you click "OK" to close the open windows. Now all the holidays for the appropriate country you marked, should be filled in your Outlook calendar automatically. This concludes this tip. | |
Apply amazing picture effects in Word
| Applys to: Word | Difficulty: 2 |
With Word 2007, Microsoft has boosted their picture tools quite a bit. If you import a picture to Word, select it with the mouse, and go to the "Format" pane, you can see a lot of opportunities there. The best way to learn what it can do, is simply to play around. Also, if you've done a lot of changes, and want to undo everything, you can click on the "Reset picture" button in the "Adjust" area. For reference, I've made some different examples for you here: The upper left picture is the original, and all the changes made to the others, are made by Word. Now, if you want some nice graphics on your homepage, but don't have the skills or time to dig into Photoshop, this can provide you with pretty decent graphics, in a very short time. This concludes this tip. | |
Auto generate random text in Word
| Applys to: Word | Difficulty: 2 |
Sometimes you just need some fill text for testing purposes or perhaps you're creating a template, and want to insert some demo text. As always, for some strange reason, it takes a long time do decide what to write, as you want it to be random, and not just copy / paste the same sentence again and again. Word can do this for you, through the =rand() command. Just write this in your Word document, and press enter: Now, perhaps you don't need that much text. The =rand() command can also take two parameters: =rand(X,Y) X is the number of paragraphs you want, and Y is the number of sentences. So... =rand(2, 3) will generate this: 2 paragraphs with 3 sentences each. Also, you can use the =lorem() command the exact same way, to get the famous "Lorem ipsum" text. More about Lorem ipsum here: http://www.lipsum.com/ This concludes this tip. | |
Fit a specific cell-area to a whole page when printing
| Applys to: Excel | Difficulty: 1 |
Have you ever been in a situation, where you wanted to print a chart or a report from Excel out on some paper, and then spend a long time stretching and scaling the content to fit an entire A4 page? Fortunately, you can get around this very easy. In my demo-sheet, I have a 2 charts, that I want to show my boss. And I want them to fit a whole page each, including the note at the bottom: What I want to do, is click on "View" in the on the top menu, and then click on "Page Break Preview" to get this view: To start with, I only have one page break at the bottom, but since I need the two charts to be on each paper, I need another one. To add a page break, right-click on row numbers to the left, and choose "Insert page break". Now I can drag the page break lines to fit the areas I want, like this: Now when I press the print button, I will get 2 papers with the charts fitted as on the screen. All the darkgray area, will not be printed out. As you might have noticed, the page headline "My reports for printing" also has a darkgray background. You can resize the page breaks from either side, and since it would look bad to have the overall report headline on one of the charts, I simply dragged the top page break one row down. This concludes this tip. | |
Subscribe to:
Comments (Atom)


